How to install nanostack
One command. Verified adapters today: Claude Code, Cursor, OpenAI Codex, OpenCode, and Gemini CLI.
Step-by-step guide
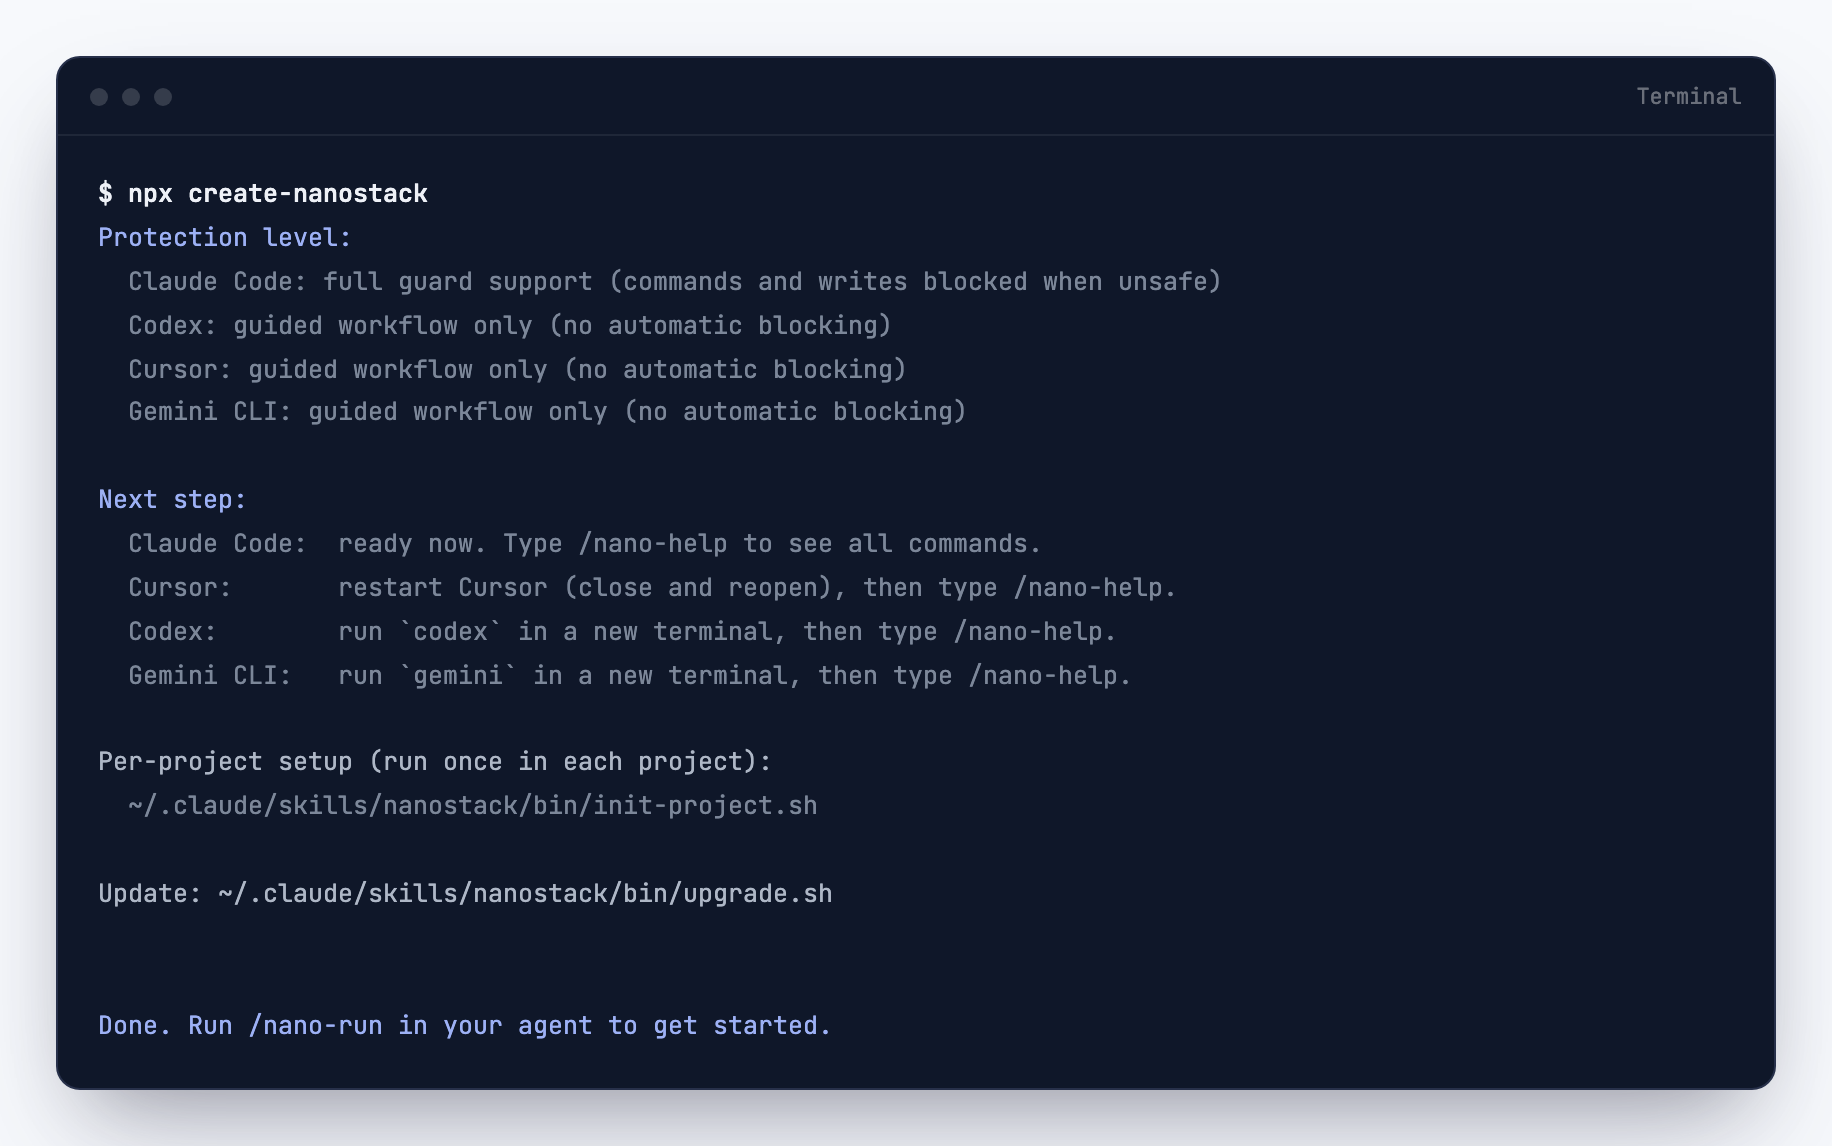
Never opened a terminal? Pick your agent and follow the steps. The installer output shown below is captured from a real run, so you know what a successful install looks like.
If you want the short version for developers, skip ahead to Install.
I use Claude Code
- Open the Terminal app on your computer. On Mac, press Cmd + Space, type Terminal and press Enter. On Windows, search for Terminal in the Start menu.
- Paste npx create-nanostack and press Enter. Wait for the installer to finish. The end of a real run looks like this:
- Type claude and press Enter. Claude Code opens and shows the welcome screen with the orange-bordered card, recent activity and version info.
- Type /nano-run and press Enter. Claude walks you through the first setup.
I use Cursor
- Open Cursor. If you do not have it yet, download it from cursor.com.
- Open the terminal. Press Ctrl + ` on Windows/Linux or Cmd + ` on Mac. A panel opens at the bottom of the window with a blinking cursor.
- Paste npx create-nanostack and press Enter.
- Wait about 30 seconds for the installer to finish. You will see a Done. line when it is ready.
- In the Cursor chat panel, type /nano-run and press Enter. Cursor walks you through your first setup.
I use another agent (OpenAI Codex, OpenCode, Gemini CLI)
The same command works in every supported agent. Open your agent's terminal and run npx create-nanostack. The installer detects which agents you have and configures them automatically.
After it finishes, type /nano-run inside your agent to set up your first project.
Install
Run the installer from any directory. It detects which AI agents you have installed, clones the repo, sets up symlinks so every agent can find the skills, and verifies the result.
npx create-nanostack
That single command handles everything. No global installs, no config files to edit manually.
What it does, step by step
- Detects agents— scans for the verified adapters: Claude Code, Cursor, OpenAI Codex, OpenCode, and Gemini CLI. It only configures the ones it finds. The skill files are plain text, so other agents may load them, but only those five have a verified adapter and capability declaration in this repo.
- Clones the repo— pulls the latest release to ~/.nanostack.
- Creates symlinks— links skill files into each agent's expected location so they're available as slash commands.
- Verifies— runs a quick check that every skill loads correctly and prints a summary.
Verify the installation
If you want to re-run the verification step later, or if something feels off:
npx create-nanostack doctor
This checks symlinks, file permissions, agent configs, and reports anything that needs attention.
Gemini CLI alternative
If you only use Gemini CLI, you can install nanostack as an extension directly:
gemini extensions install https://github.com/garagon/nanostack --consent
This skips the multi-agent detection and installs nanostack only for Gemini. The standard npx create-nanostack method also supports Gemini CLI, so use whichever you prefer.
Update
Two options. From your terminal:
npx create-nanostack update
Or from inside any supported agent:
/nano-update
Both pull the latest skills and re-run the symlink step. Your local customizations in ~/.nanostack/custom/ are preserved.
Requirements
- Node.js 18+ — for the npx installer
- git — to clone and update the repo
- jq — used by some bin/ scripts for JSON processing
- macOS, Linux, or Windows(Git Bash or WSL) — native Windows cmd is not supported
Most developer machines already have these. If npx create-nanostack doctor flags a missing dependency, install it with your system package manager and re-run.